
This is the third article in the series “Developing your own programming language in Java”. For better understanding, you should read the first and second articles.
In this article, we will learn how to compile our programming language (Jimple) to Java bytecode. We will also compare the execution time of Jimple code interpretation (from the first article) and compiled Jimple to Java bytecode.
Java Bytecode
Java bytecode is a set of instructions for the Java Virtual Machine (JVM). Source code written in Java and other JVM-compatible languages is compiled into bytecode. The JVM executes bytecode by converting it to machine code that is understandable by a specific platform. However, bytecode is not immediately converted to machine code; it is first interpreted by the JVM. If the JVM detects that code is executed frequently (or for other reasons), it can compile it to machine code. This approach is called JIT compilation (Just-In-Time). There are also AOT compilers (Ahead-Of-Time) that allow application developers to compile programs to machine code before execution. This can improve application startup time and reduce memory usage, which is especially useful for microservices and serverless applications.
Let’s compile the famous “Hello, world!” program in Java and see what its bytecode looks like. For this, we’ll create a file HelloWorld.java with the following content:
public static void main(String[] args) {
System.out.println(“Hello, World!“);
}
}
Then execute the following command:
After compilation, a file HelloWorld.class containing the bytecode will appear in the current directory. This file is usually smaller than the source code because bytecode is optimized for execution by the Java virtual machine. This file is binary and can be viewed with any hex editor.
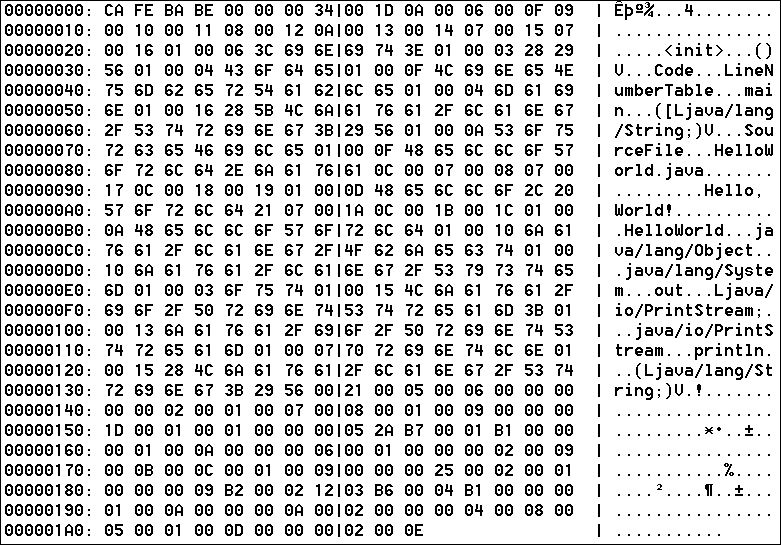
As you can see from the figure, bytecode in this form is difficult for humans to read. For convenient bytecode reading, we can use the special utility javap, which is part of the JDK. This utility allows you to view the contents of .class files in a readable format. Execute the following command:
The output will be approximately like this:
minor version: 0
major version: 52
flags: ACC_PUBLIC, ACC_SUPER
Constant pool:
#1 = Methodref #6.#15 // java/lang/Object.”<init>”:()V
#2 = Fieldref #16.#17 // java/lang/System.out:Ljava/io/PrintStream;
#3 = String #18 // Hello, World!
#4 = Methodref #19.#20 // java/io/PrintStream.println:(Ljava/lang/String;)V
#5 = Class #21 // HelloWorld
#6 = Class #22 // java/lang/Object
#7 = Utf8 <init>
#8 = Utf8 ()V
#9 = Utf8 Code
#10 = Utf8 LineNumberTable
#11 = Utf8 main
#12 = Utf8 ([Ljava/lang/String;)V
#13 = Utf8 SourceFile
#14 = Utf8 HelloWorld.java
#15 = NameAndType #7:#8 // “<init>”:()V
#16 = Class #23 // java/lang/System
#17 = NameAndType #24:#25 // out:Ljava/io/PrintStream;
#18 = Utf8 Hello, World!
#19 = Class #26 // java/io/PrintStream
#20 = NameAndType #27:#28 // println:(Ljava/lang/String;)V
#21 = Utf8 HelloWorld
#22 = Utf8 java/lang/Object
#23 = Utf8 java/lang/System
#24 = Utf8 out
#25 = Utf8 Ljava/io/PrintStream;
#26 = Utf8 java/io/PrintStream
#27 = Utf8 println
#28 = Utf8 (Ljava/lang/String;)V
{
public HelloWorld();
descriptor: ()V
flags: ACC_PUBLIC
Code:
stack=1, locals=1, args_size=1
0: aload_0
1: invokespecial #1 // Method java/lang/Object.”<init>”:()V
4: return
LineNumberTable:
line 2: 0
public static void main(java.lang.String[]);
descriptor: ([Ljava/lang/String;)V
flags: ACC_PUBLIC, ACC_STATIC
Code:
stack=2, locals=1, args_size=1
0: getstatic #2 // Field java/lang/System.out:Ljava/io/PrintStream;
3: ldc #3 // String Hello, World!
5: invokevirtual #4 // Method java/io/PrintStream.println:(Ljava/lang/String;)V
8: return
LineNumberTable:
line 4: 0
line 5: 8
}
Even in this form, the bytecode doesn’t look very readable, but you can already see the program structure. For example, we see the symbol table, information about methods and used classes. You can also see that the main method gets a reference to the standard output stream System.out, then calls the println method to output the string “Hello, World!”. Mnemonics (e.g., getstatic, ldc, invokevirtual) are symbolic representations of bytecode instructions executed by the JVM. We won’t delve deeply into mnemonics, but this is precisely the level of abstraction we’ll work with when compiling Jimple to bytecode.
JVM Stack Architecture
The Java Virtual Machine has a stack-oriented architecture. This means operations are performed on values stored in a stack. The virtual machine uses the stack to store operands, local variables, and intermediate computation results. For example, when performing addition of two numbers, both numbers are placed on the stack, then the addition operation is executed, which extracts these two numbers from the stack, adds them, and places the result back on the stack.
For example, let’s compile a method that adds two integers:
return a + b;
}
The bytecode for this method will look as follows:
iload_2 // Load the second int argument onto the stack
iadd // Extract the top two values from the stack, add them, and put the result back on the stack
ireturn // The top stack value is extracted and returned to the calling method
However, a single stack is not sufficient for efficient method execution, so the virtual machine uses the concept of frames. A frame is a data structure that contains all the data necessary for executing a specific method, including local variables, operands, and stack state information. Every time a method or constructor is called, a new frame is created and placed on the call stack. When a method completes, its frame is removed from the call stack. The method’s return value is placed on the operand stack of the calling method.
What to Use for Bytecode Generation?
To compile Jimple to Java bytecode, we’ll use the time-tested ASM library. It allows working with Java bytecode at a low level and also provides useful tools for validation and analysis of generated code.
An example of generation for the “Hello, world!” program using ASM might look like this:
cw.visit(V17, ACC_PUBLIC, “HelloWorld“, null, “java/lang/Object“, null);
// Generate default constructor
MethodVisitor mv = cw.visitMethod(ACC_PUBLIC, “<init>“, “()V“, null, null);
mv.visitCode();
mv.visitVarInsn(ALOAD, 0);
mv.visitMethodInsn(INVOKESPECIAL, “java/lang/Object“, “<init>“, “()V“, false);
mv.visitInsn(RETURN);
mv.visitMaxs(0, 0);
mv.visitEnd();
// Generate public static void main(String[] args)
mv = cw.visitMethod(ACC_PUBLIC + ACC_STATIC, “main“, “([Ljava/lang/String;)V“, null, null);
mv.visitCode();
// System.out
mv.visitFieldInsn(GETSTATIC, “java/lang/System“, “out“, “Ljava/io/PrintStream;“);
// “Hello, World!” string
mv.visitLdcInsn(“Hello, World!“);
// println call
mv.visitMethodInsn(INVOKEVIRTUAL, “java/io/PrintStream“, “println“, “(Ljava/lang/String;)V“, false);
mv.visitInsn(RETURN);
mv.visitEnd();
cw.visitEnd();
// Write the generated class to a file
try (FileOutputStream fos = new FileOutputStream(“HelloWorld.class“)) {
fos.write(cw.toByteArray());
}
Starting with JDK 24, you can parse, generate, and transform class files without third-party libraries, as a built-in API has been added that simplifies these operations (JEP 484: Class-File API).
There’s another way to generate bytecode from a new language – first convert Jimple to another language (e.g., Java or Kotlin), then compile it using a standard compiler (e.g., javac for Java). This type of compilation is called transpilation.
JimpleBaseVisitor Again
To compile Jimple to Java bytecode, we’ll use the already familiar (from the previous two articles) abstract class JimpleBaseVisitor (generated by ANTLR). It allows traversing the AST tree (Abstract Syntax Tree) and performing actions on each tree node. We’ll override methods for each node type to generate corresponding bytecode.
We’ll create a new class JimpleCompilerVisitor that inherits from JimpleBaseVisitor and implements methods for bytecode generation. It’s known that each method of this class must return a value of a specific type. In our case, we’ll return information about the node type in the tree – CompilationInfo.
Why do we need type information? Many bytecode instructions depend on operand types, so we need to know what data type we’re processing at the moment. For example, if we’re processing an integer, we should use instructions for working with integers. Many instructions have prefixes and/or suffixes indicating the operand types they work with. These include the following:
|
Suffix/Prefix |
Operand Type |
|
i |
integer |
|
l |
long |
|
s |
short |
|
b |
byte |
|
c |
character |
Another type-related problem is that in Jimple we don’t use explicit types for function parameters and return values. When I wrote the Jimple interpreter (first article), I identified types during runtime. This was quite easy to implement and the language itself looks simpler. But in a compiler, we must know types in advance to generate correct bytecode (or always return Object). Therefore, we’ll have to compute the function’s return value type based on its body. To identify the type of any expression, a getExpressionType method was written with one parameter of type ExpressionContext (base class of all expressions).
Compiler Implementation
Since the root rule of our grammar is the program rule (see Jimple.g4 file), code compilation starts with it. For this, we call the visitProgram method on the JimpleCompilerVisitor object, passing it an object of class ProgramContext. After calling this method, all AST nodes will be processed, and we can get the generated bytecode using the getBytecode method. The bytecode, which is an array of bytes, can be written to a file and run using the JVM.
visitor.visitProgram(parser.program());
byte[] bytecode = visitor.getBytecode();
In the visitProgram method, the main ClassWriter class is created, which will be used for bytecode generation. In this method, we also create a constructor and main method. Methods in ASM are created by calling visitMethod, which returns an object of type MethodVisitor. Using this class, we can generate bytecode for each method. The visitMethod method takes parameters: access attributes (e.g., ACC_PUBLIC), method name, its descriptor, and others.
The method descriptor deserves special attention: it defines the parameter types that the method accepts and what type the method returns. Descriptors in the JVM are encoded in a special way. For example, for the main method it looks like “([Ljava/lang/String;)V”, which can be deciphered as the method takes one argument of type string array – [Ljava/lang/String; and returns void – V. A description of descriptors can be found in the JVM specification.
Since there can be multiple methods calling each other (and even themselves), we use a stack to store all methods, where the “head” of the stack stores the current method. Therefore, to start traversing the entire tree, we need to put the MethodVisitor (of the main method) on the stack and call the parent implementation visitProgram (super.visitProgram(ctx)). At the end of the visitProgram method, we can get the generated bytecode using the toByteArray method on the ClassWriter object.
ClassWriter cw = new ClassWriter(ClassWriter.COMPUTE_MAXS | ClassWriter.COMPUTE_FRAMES);
// create the class with name “JimpleAutoGenApp”
cw.visit(Opcodes.V1_8, Opcodes.ACC_PUBLIC, “JimpleAutoGenApp“, null, “java/lang/Object“, null);
// Define a constructor
MethodVisitor constructor = cw.visitMethod(Opcodes.ACC_PUBLIC, “<init>“, “()V“, null, null);
constructor.visitCode();
constructor.visitVarInsn(Opcodes.ALOAD, 0);
constructor.visitMethodInsn(Opcodes.INVOKESPECIAL, “java/lang/Object“, “<init>“, “()V“, false);
constructor.visitInsn(Opcodes.RETURN);
constructor.visitEnd();
// Create the main method
MethodVisitor mainMethod = cw.visitMethod(Opcodes.ACC_PUBLIC + Opcodes.ACC_STATIC, “main“, “([Ljava/lang/String;)V“, null, null);
mainMethod.visitCode();
// set mainMethod as current (put on the top)
methods.push(mainMethod);
super.visitProgram(ctx);
methods.pop();
mainMethod.visitInsn(Opcodes.RETURN);
mainMethod.visitEnd();
cw.visitEnd();
this.bytecode = cw.toByteArray();
return VOID;
}
To ultimately get bytecode, we need to implement all necessary visitXxx methods. They will generate corresponding bytecode for each language construct. Let’s consider a simple case when a string is encountered in the program text. In this case, we need to generate an ldc <index> instruction, where index is the index from the constant pool of the current class. Where do we get it? In ASM library, this is done automatically using the visitLdcInsn method. You can pass a string, number, type, etc. as a parameter to this method. In our case, we pass a string. After calling this method, the string will be placed in the class constant pool, and an ldc instruction with the corresponding index will be added to the bytecode. At the end of the method, we return information about the node type – CompilationInfo.STRING. For other types, similar methods need to be implemented.
public CompilationInfo visitStringExpr(JimpleParser.StringExprContext ctx) {
String value = StringUtil.cleanStringLiteral(ctx.STRING_LITERAL().getText());
getCurrentMethod().visitLdcInsn(value);
return CompilationInfo.STRING;
}
A more complex case is arithmetic operations. For example, consider the addition operation. In Jimple, it might look like: a + b, where a and b can be variables or constants. In this case, we need to generate instructions for loading values a and b onto the stack, then an instruction for adding these values. For this, we call the getExpressionType method for each operand to get their types. Then, depending on the operand types, we generate the corresponding addition instruction. For example, if both operands are of type long, we generate the ladd instruction. If one of the operands is of type double, we generate the dadd instruction.
We also need to consider the case when one of the operands is a string. In this case, the + operation should be interpreted as string concatenation. For this, we use the StringBuilder class to assemble the resulting string.
Another important point is type casting. Java has implicit and explicit type casting. In our compiler, we implement implicit type casting to simplify language usage. For example, if one operand is of type long and the other is of type double, we automatically cast long to double. For this, we use the convertAfterFirstArg and convertAfterSecondArg methods, which generate corresponding type casting instructions. The method itself returns information about the resulting type of this expression.
MethodVisitor method = getCurrentMethod();
int typeLeft = getExpressionType(ctx.left);
int typeRight = getExpressionType(ctx.right);
// check if plus is string concat operator
if (ctx.op.getType() == JimpleParser.PLUS && (isStaticString(typeLeft) || isStaticString(typeRight))) {
method.visitTypeInsn(NEW, “java/lang/StringBuilder“);
method.visitInsn(DUP);
method.visitMethodInsn(INVOKESPECIAL, “java/lang/StringBuilder“, “<init>“, “()V“, false);
CompilationInfo left = visit(ctx.left);
String typeDescrLeft = makeFuncDescriptor(left, “Ljava/lang/StringBuilder;“);
method.visitMethodInsn(INVOKEVIRTUAL, “java/lang/StringBuilder“, “append“, typeDescrLeft, false);
CompilationInfo right = visit(ctx.right);
String typeDescrRight = makeFuncDescriptor(right, “Ljava/lang/StringBuilder;“);
method.visitMethodInsn(INVOKEVIRTUAL, “java/lang/StringBuilder“, “append“, typeDescrRight, false);
method.visitMethodInsn(INVOKEVIRTUAL, “java/lang/StringBuilder“, “toString“, “()Ljava/lang/String;“, false);
return CompilationInfo.STRING;
}
int commonType = commonType(typeLeft, typeRight);
switch (ctx.op.getType()) {
case JimpleParser.PLUS:
visit(ctx.left);
convertAfterFirstArg(typeLeft, typeRight);
visit(ctx.right);
convertAfterSecondArg(typeLeft, typeRight);
method.visitInsn(getAddOpcode(commonType));
return new CompilationInfo(commonType);
case JimpleParser.MINUS:
visit(ctx.left);
convertAfterFirstArg(typeLeft, typeRight);
visit(ctx.right);
convertAfterSecondArg(typeLeft, typeRight);
method.visitInsn(getSubOpcode(commonType));
return new CompilationInfo(commonType);
default:
throw new UnsupportedOperationException(“Unsupported operator: “ + ctx.op.getText());
}
}
Another important but not complex construct to implement is the conditional if statement. This statement consists of three parts: condition, if body, and optional else body. In bytecode, we can implement the if statement using conditional and unconditional jump instructions. First, we generate code for evaluating the condition. Then we create two labels: one for jumping to the else body and another for exiting the entire if statement. If the condition is false, we jump to the labelFalse label, otherwise we execute the if body. If an else body is present, we add an unconditional jump instruction (goto) to the exit label after executing the if body.
visit(ctx.expression());
Label labelFalse = new Label();
Label labelExit = new Label();
boolean hasElse = ctx.elseStatement() != null;
// if the value is false, then go to the else statement or exit if there is no else
MethodVisitor method = getCurrentMethod();
method.visitJumpInsn(IFEQ, hasElse ? labelFalse : labelExit);
// true
visit(ctx.statement());
if (hasElse) {
method.visitJumpInsn(GOTO, labelExit);
// false
method.visitLabel(labelFalse);
visit(ctx.elseStatement());
}
method.visitLabel(labelExit);
return CompilationInfo.VOID;
}
Monomorphization
As mentioned above, Jimple has no explicit types for function parameters and return values. Types are computed during compilation. This in turn allows implementing an interesting capability in the language. Consider the following example:
return a + b
}
println sum(4, 2)
println sum(“4”, “2”)
In this example, the sum function is declared once but called twice: first with two integers, and second with two strings. In Jimple, during the compilation, two versions of the sum function will be generated: one for integers and another for strings. This allows using the same code for different data types. This process is called monomorphization, and the function is polymorphic. In Java, this would have to be implemented by defining multiple methods (see method overloading).
In bytecode, this would look as follows:
GETSTATIC java/lang/System.out : Ljava/io/PrintStream;
LDC 4
LDC 2
INVOKESTATIC JimpleAutoGenApp.sum (JJ)J
INVOKEVIRTUAL java/io/PrintStream.println (J)V
GETSTATIC java/lang/System.out : Ljava/io/PrintStream;
LDC “4“
LDC “2“
INVOKESTATIC JimpleAutoGenApp.sum (Ljava/lang/String;Ljava/lang/String😉Ljava/lang/String;
INVOKEVIRTUAL java/io/PrintStream.println (Ljava/lang/String;)V
RETURN
private static sum(JJ)J
LLOAD 0
LLOAD 2
LADD
LRETURN
private static sum(Ljava/lang/String;Ljava/lang/String😉Ljava/lang/String;
NEW java/lang/StringBuilder
DUP
INVOKESPECIAL java/lang/StringBuilder.<init> ()V
ALOAD 0
INVOKEVIRTUAL java/lang/StringBuilder.append (Ljava/lang/String😉Ljava/lang/StringBuilder;
ALOAD 1
INVOKEVIRTUAL java/lang/StringBuilder.append (Ljava/lang/String😉Ljava/lang/StringBuilder;
INVOKEVIRTUAL java/lang/StringBuilder.toString ()Ljava/lang/String;
ARETURN
Textifier and ASMifier
ASM provides two useful classes for textual visualization of bytecode: Textifier and ASMifier. The first class allows outputting bytecode in text format, similar to javap -v output. The second class allows outputting bytecode as Java code that can be used to generate bytecode using ASM. This is useful for debugging and understanding how to use ASM. Usage example:
ASMifier.main(new String[]{FooBar.class.getName()});
Testing
Back in the first article, a special mini-framework was written for testing the Jimple interpreter that allows running chunks of Jimple code and checking the actual program output against the expected output. To test the compiler, we can use the same approach. Instead of running the interpreter, we’ll compile Jimple code to JVM bytecode and run the compiled class directly from the test. The nicest part is that the compiler can be tested on the same test programs as the interpreter.
Bytecode Validation
Generating bytecode manually, even with a library, is not the most trivial task. It’s easy to make a mistake that leads to incorrect bytecode. The ASM library provides the CheckClassAdapter class for validating generated bytecode. This class allows checking bytecode for compliance with some JVM specification rules. If the bytecode is incorrect, an exception with an error description will be thrown. CheckClassAdapter can be used both after and during bytecode generation. In the second case, we simply need to wrap ClassWriter in CheckClassAdapter since the latter also implements the ClassVisitor interface.
Let’s consider the following correct example of bytecode generation using CheckClassAdapter:
CheckClassAdapter cv = new CheckClassAdapter(cw);
cv.visit(Opcodes.V1_8, ACC_PUBLIC, CLASS_NAME, null, “java/lang/Object“, null);
MethodVisitor method = cv.visitMethod(ACC_PUBLIC + ACC_STATIC, “main“, “([Ljava/lang/String;)V“, null, null);
method.visitCode();
method.visitFieldInsn(GETSTATIC, “java/lang/System“, “out“, “Ljava/io/PrintStream;“);
method.visitLdcInsn(12L);
method.visitLdcInsn(33L);
method.visitMethodInsn(INVOKESTATIC, “java/lang/Math“, “max“, “(JJ)J“, false);
method.visitMethodInsn(INVOKEVIRTUAL, “java/io/PrintStream“, “println“, “(J)V“, false);
method.visitInsn(RETURN);
method.visitEnd();
The code is successfully generated and executed. This is equivalent to the following Java code:
System.out.println(Math.max(12L, 33L));
}
However, if we accidentally make a mistake and, for example, write method.visitLdcInsn(“33”); instead of method.visitLdcInsn(33L);, then during bytecode generation an IllegalArgumentException will be thrown with an error message:
00000 R : : GETSTATIC java/lang/System.out : Ljava/io/PrintStream;
00001 R : R : LDC 12
00002 R : R J : LDC “33“
00003 R : R J R : INVOKESTATIC java/lang/Math.max (JJ)J
00004 ? : INVOKEVIRTUAL java/io/PrintStream.println (J)V
00005 ? : RETURN
Just for the sake of curiosity, you could comment out CheckClassAdapter. In this case, the bytecode will be successfully generated, but when attempting to execute it, a VerifyError exception will occur, as the JVM will detect type mismatch.
Compilation and Execution
For convenient compilation and execution of compiled code, a utility JimpleCompilerCli was written that takes a file with Jimple code as input, compiles it to Java bytecode, and saves it as an executable jar file. This utility can be used via jimplec.sh/jimplec.bat scripts. First, we need to compile the project using Maven:
Then, to compile example.jimple, execute the following command:
# or jimplec.bat example.jimple for Windows
This command will create a target/example.jar file that can be run using the JVM:
Performance Comparison
To compare the performance of the Jimple interpreter and compiled Jimple to bytecode, we can use the following test example:
var lastFactorial = 0
var startTime = now()
while(counter < 1000000) {
lastFactorial = factorial(counter % 20 + lastFactorial % 5)
counter = counter + 1
}
var time = now() – startTime
println “lastFactorial: “ + lastFactorial
println “counter: “ + counter
println “time: “ + time
fun factorial(n) {
if (n == 0) {
return 1
}
return n * factorial(n–1)
}
This code calculates the factorial of a number in a loop one million times using a recursive factorial function, where the argument of the factorial function depends on the previous result. This is done to avoid JIT compiler optimization in the JVM, which might notice that the function is always called with the same arguments and cache the result. In the interpreter, we don’t have such optimization, so the comparison will be fair. This code was run 100 times each in the interpreter and in compiled form. The average execution time looks as follows:
|
Jimple Interpreter |
Compiled Jimple |
Difference |
|
3466 ms |
9 ms |
~385x |
As you can see from the table, compiled code executes 385 times faster than interpreted code. Testing was conducted on a machine with Intel Core i9-13900K 3.00 GHz processor and with JVM flag -Xmx500M.
Bonus: AOT Compilation to Native Code
Starting with JDK 9, Oracle provides GraalVM JDK, which includes the Native Image tool. This tool allows compiling JVM bytecode to machine (native) code. Using this tool can significantly improve application startup time and reduce its size, as native code doesn’t require a JVM to execute. To compile Jimple to native code, we first need to compile it to bytecode (jar file), then use Native Image to create a native executable file. Example compilation command:
This command will create an executable file named example in Linux (or example.exe on Windows) that can be run directly from the command line (without java). By the way, the factorial from the previous example on native code executes on average slightly faster than compiled bytecode – about 7 ms.
Summary
In this article, we examined what Java bytecode is, its stack architecture, and how to generate bytecode from code in our language using the ASM library. At the end of the article, we compared the performance of interpreted code and compiled bytecode, and also looked at the possibility of compiling to native code using GraalVM.
All the compiler source code can be viewed at this link.
References
- https://docs.oracle.com/javase/specs/jvms/se7/html/jvms-6.html
- https://dzone.com/articles/introduction-to-java-bytecode
- https://asm.ow2.io/
- https://en.wikipedia.org/wiki/List_of_Java_bytecode_instructions
- https://www.youtube.com/watch?v=p7ipmAa9_9E
- https://openjdk.org/jeps/484
- https://martinfowler.com/bliki/TransparentCompilation.html
- https://www.graalvm.org/latest/reference-manual/native-image/